Getting your WordPress image sizes right is super important for 2 reasons.
- You want images to look good.
- Images should load fast without impacting your site speed.
This must-read guide explains everything you need to know about WordPress image sizes.
Keep reading.
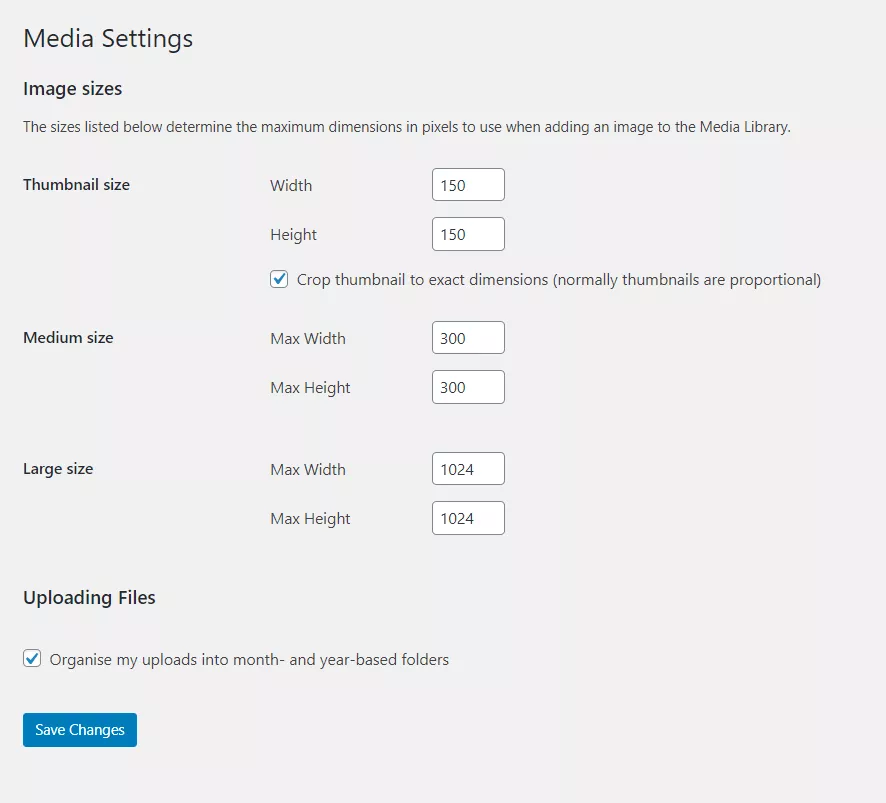
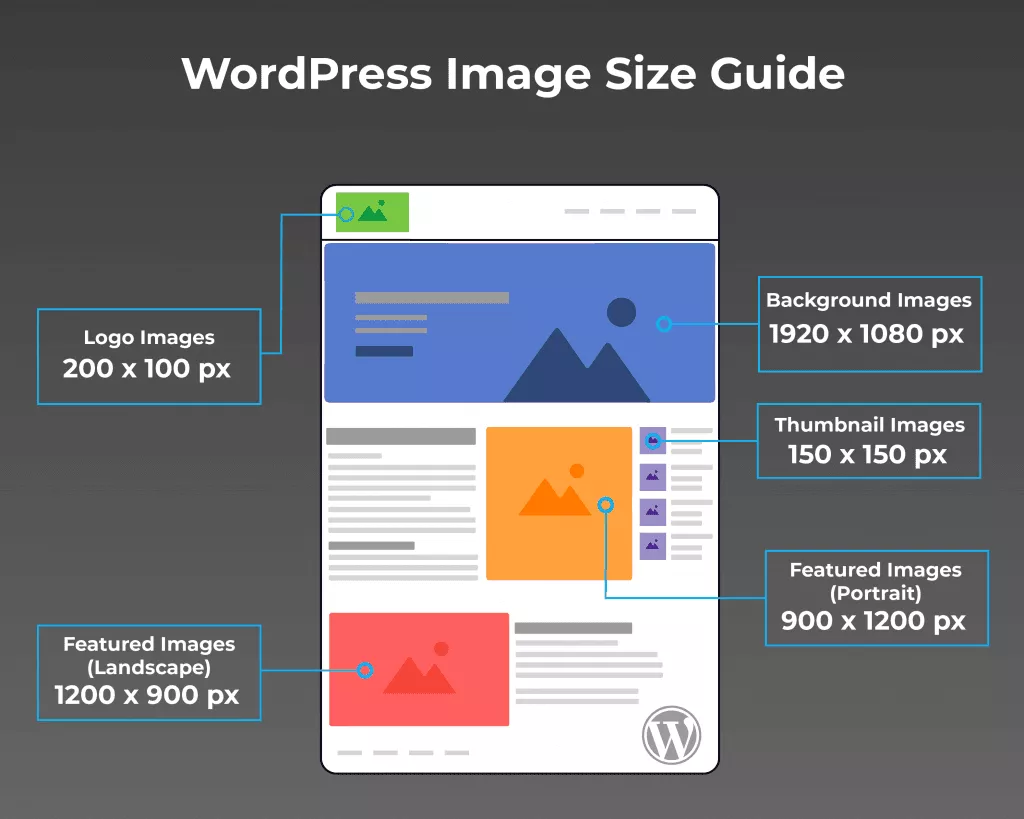
Whenever you upload an image, WordPress automatically creates 4 different image sizes:
- Thumbnail size (150 x 150 pixels)
- Medium size (maximum 300 x 300 pixels)
- Large size (maximum 1024 x 1024 pixels)
- Full size (the original size of the uploaded image)
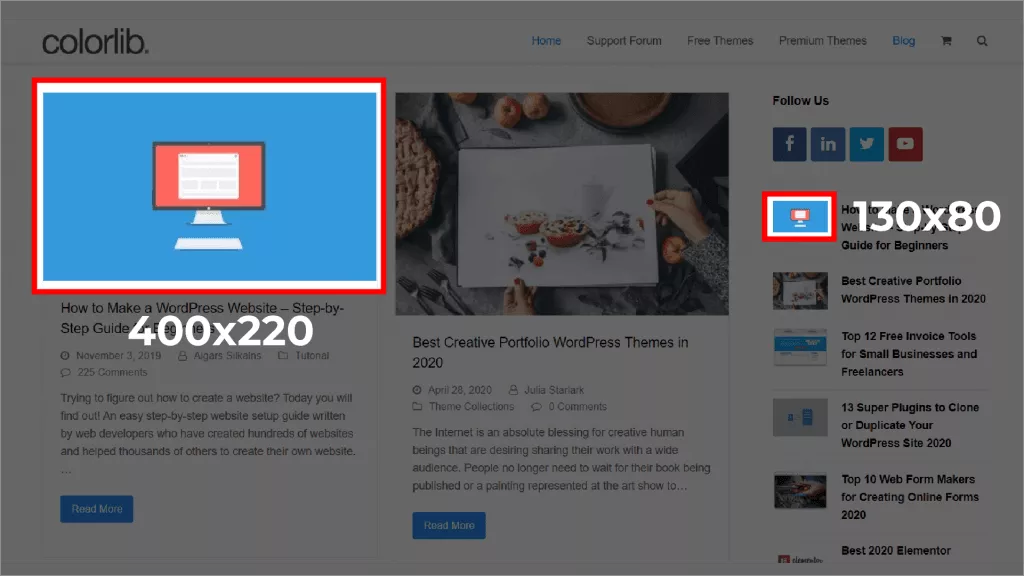
WordPress does this, so you don’t have to keep resizing images manually and to ensure the best image size is selected for different locations on your website.
For example, the image size used in the header of a blog post will be different from the blog post’s thumbnail image.
In addition to the default image sizes, you can also upload your custom image sizes to fit your needs.
Here’s how:
- Go to your WordPress Admin Dashboard
- Click on Settings – Media
- In the Media Settings, adjust the default image settings to fit your preferences
- Click Save Changes to confirm
Need Some Help With Your Images – Just Fill Out our Form Below – We Can Help
[yikes-mailchimp form=”3″]
2. best Image Sizes For WordPress
One of the most important aspects of uploading images to WordPress is to consider the size of each image file. Any image with a large file size will hurt the speed of your website, which ultimately affects user experience and can cause visitors to ‘bounce’ from your site.
There’s no point having images any bigger than they need to be.
As a general rule, WordPress image sizes should be no bigger than 150kb except for large photos.

Website speed is incredibly important when it comes to the success of your website.
Compressing images before uploading to WordPress gives extra performance without sacrificing the quality of your images (it doesn’t resize images).
Every image you upload to your site should have image compression applied; otherwise, your negatively impacting your site’s performance.
Great online compression tool: tinypng.com, which compresses images within the current dimensions without losing image quality.

As a basic rule of thumb, choose JPEG for photos and PNG for graphics.
JPEG
Joint photographic experts group or JPEG as it’s commonly known supports 16 million colours and is the smallest file size for photos. Using JPEG for your photo’s means the image will not only load faster, but it will also appear more vibrant.
PNG
Portable Network Graphic (PNG) supports fewer colours than JPEG but allows for image transparency and is becoming the default choice for website elements like graphics and logos.
GIF
Graphics Interchange Format (GIF) supports 256 colours, transparency and can be animated.
PNG 230KB
JPEG 112KB
Did you know that your WordPress images can attract more visitors to your website?
By performing some minor tweaks to each image you upload, you can give your images a great shot at showing at the top of google images.
Here’s how:
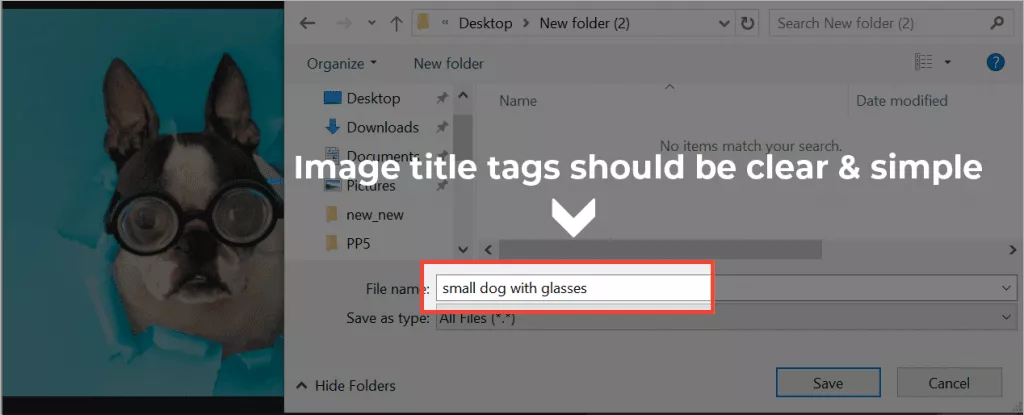
Title Tags
Title tags can give clues to search engines to help them understand what your image is about.
So instead of uploading img_45632.jpg update the tirle to something more accurate and descriptive -> small-grey-cat.jpg.